When I first began practicing kitsuke, I struggled. I had wrinkles everywhere, my ohashori was more of a bubble around my waist than a neat fold, and my collars, god my collars! The juban collars would always, always get eaten by the kimono collars, usually within the first few minutes. It took two years of experimentation, trial and error, and sometimes ripping my hair out, for me to slowly realize just how important padding and a proper juban are to making a kimono look good.
The goal of any kitsuke isn’t to make the wearer’s body look good, but to make the garment look good and show off the work of the artisan who made the kimono. Unlike western fashion, curves do nothing for kimono except to give you wrinkles. The ideal shape for kitsuke is a cylinder. Very few, no scratch that, no person on earth is a perfect cylinder. We achieve this look through the use of padding. And every person has their own padding combination that works for them. Some people use padding on their waist or the small of their back to fill in curves, some use padding on their shoulders for the same reason, and most people I know wear a kimono bra, sports bra, or something else that shrinks down anything bigger than an A cup to a flat chest.
A close friend of mine and I have been studying kimono and kitsuke at the same time, but we’re also in a unique situation. She learns from a teacher from the Sodo School of kimono (makers of the biyosugata and authors of The Book of Kimono). On the other hand, I take lessons from a teacher who learned at a small, local school called the Nishi Nihon Wasoukai. Both are valid schools of kimono, and both teach their students different ways of padding to achieve the ideal shape. It’s really interesting for us to compare notes on what our teachers recommend for us for padding and juban. We’d like to share some of those differences with you now.
For those of you new to kimono, please don’t take this as the only way to use padding and a juban. This is just what works for us. You have to find what works for you.
What I Do
Kimono Bra
The first layer for both of us is the kimono bra. The combination of the bra and the removable padding inside compresses the bust and makes it firm. There are different styles of kimono bra that are available commercially, some more expensive than others. The one that both of us prefer just happens to be one of the more expensive brands on the market, averaging around 5000 yen. You can find them online here.
http://www.yosooi.co.jp/SHOP/0170024.html
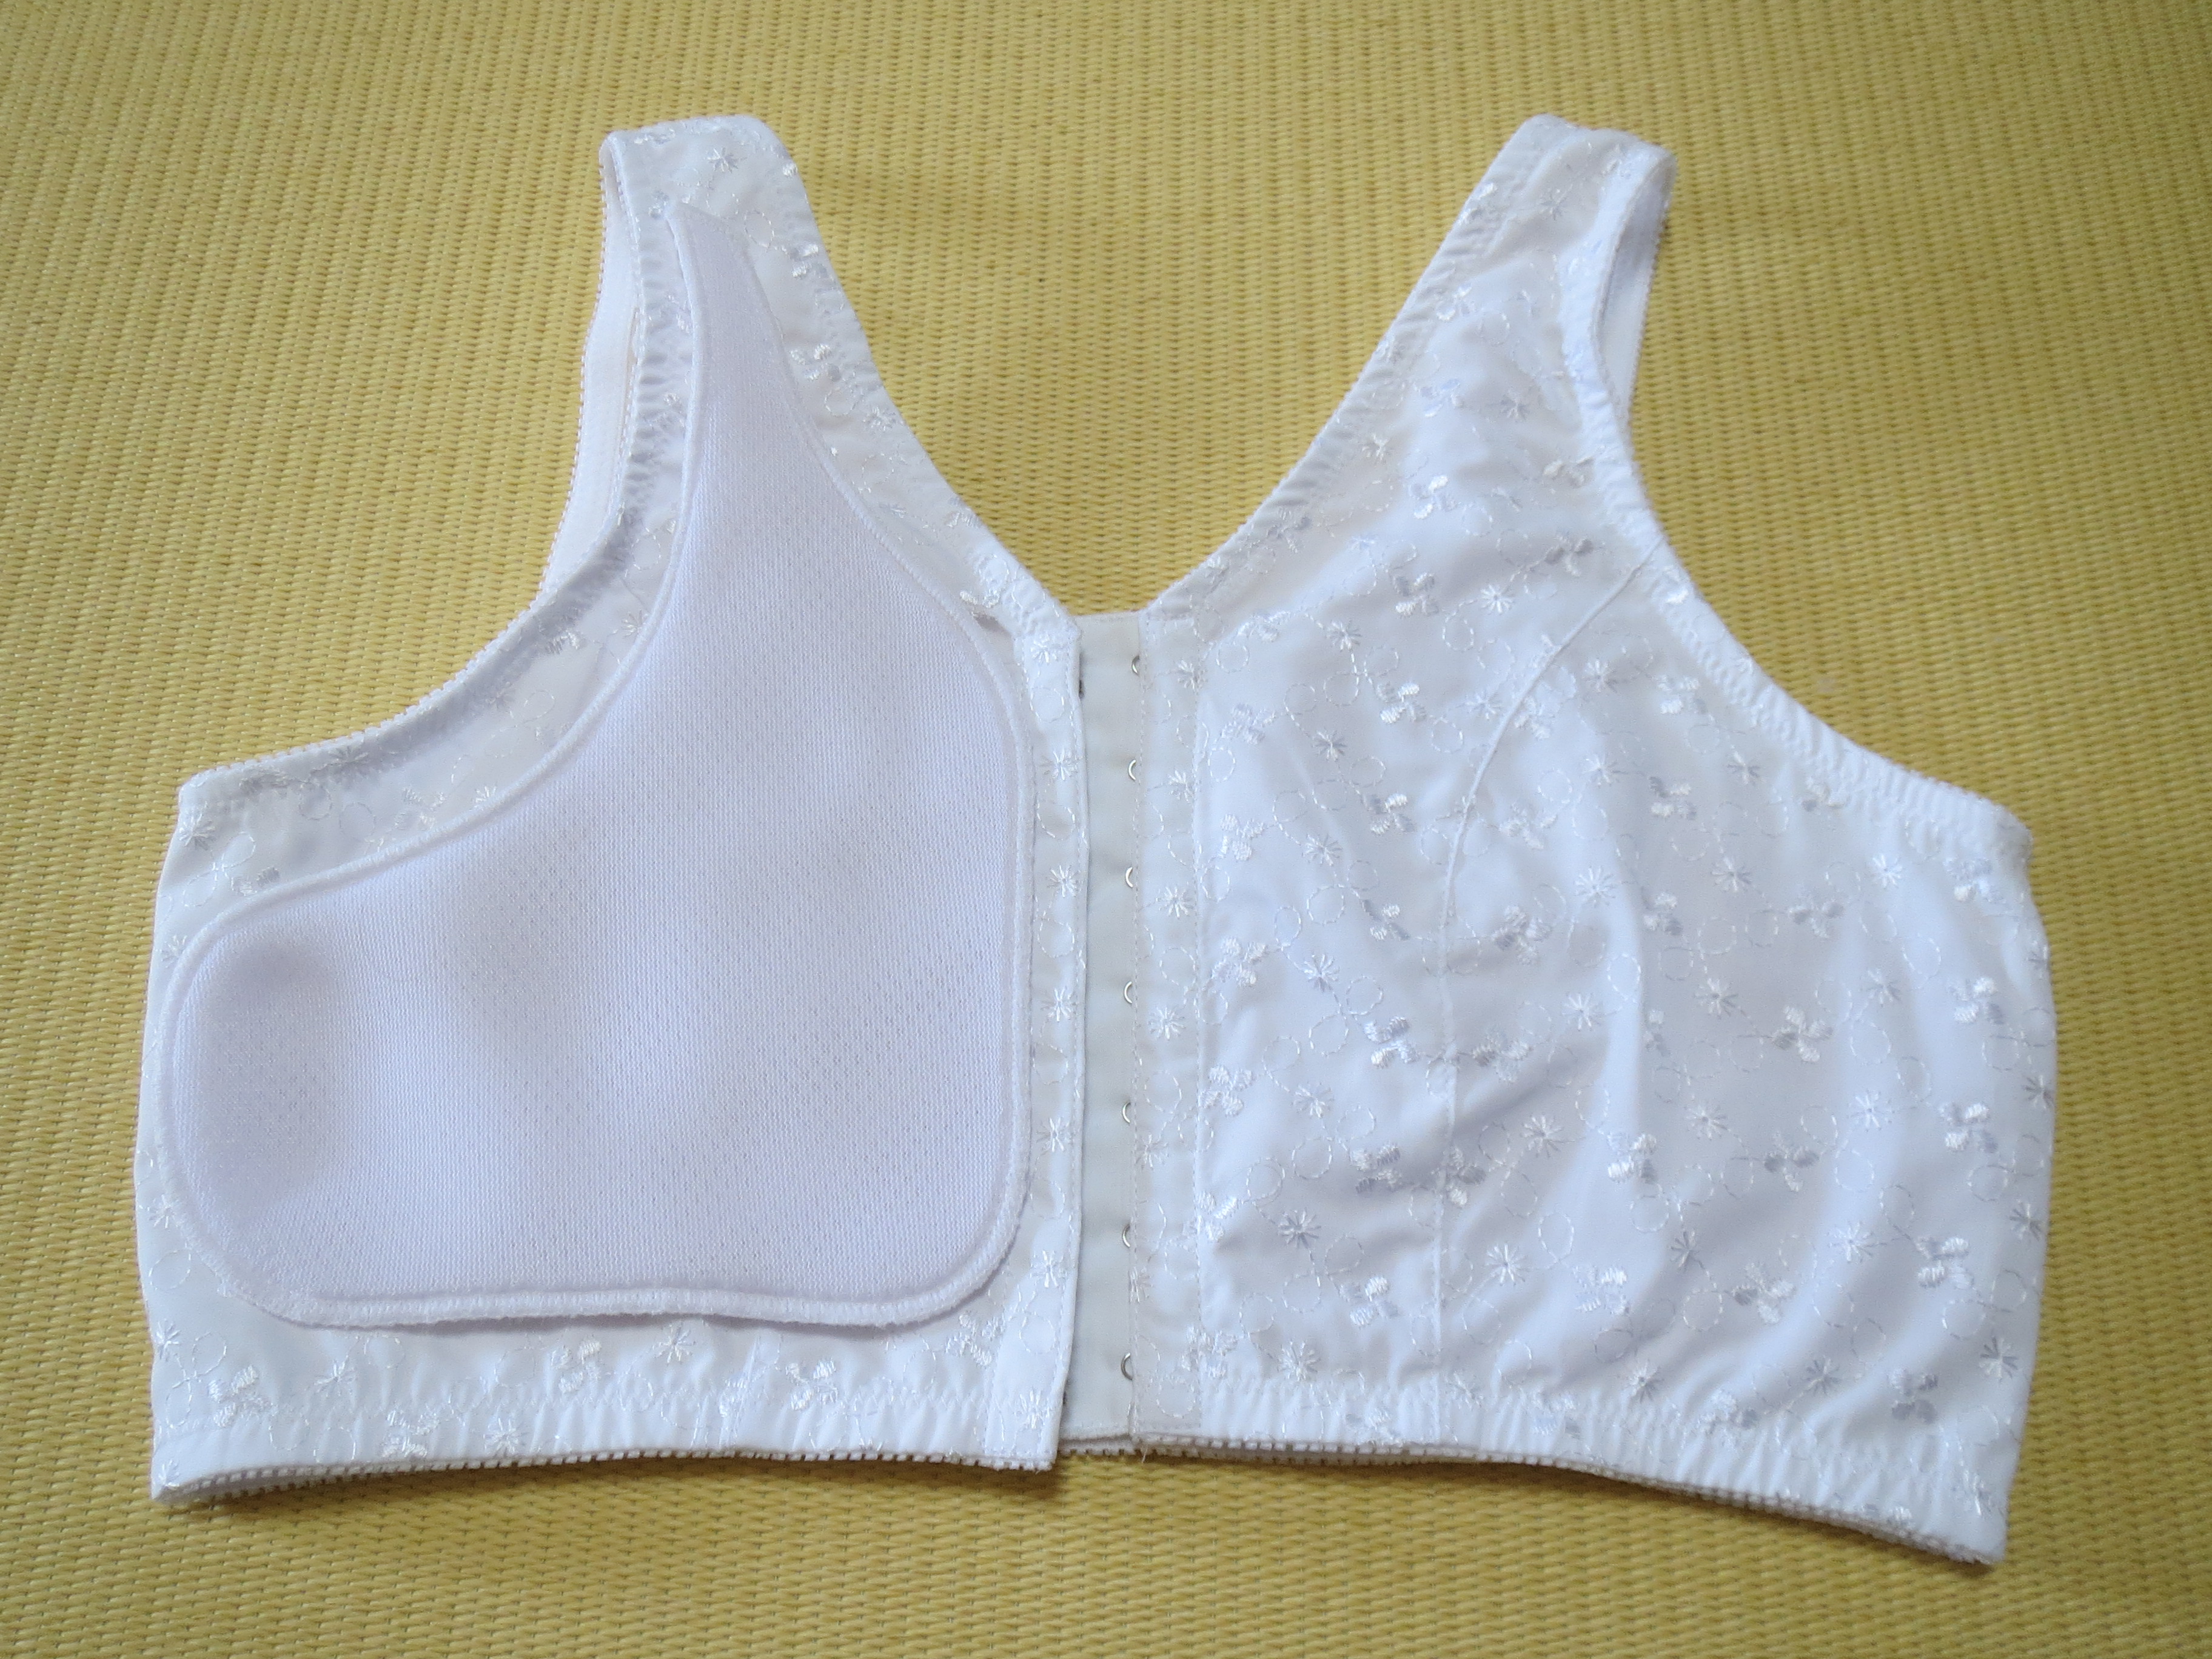
My preferred kimono bra comes with removable padding which you can see on the left hand side.
Here is a comparison between a regular bra on the left and a kimono bra on the right. It doesn’t look like much, but it makes a huge amount of difference to the finished look.

This is another kimono bra that I’ve tried that was cheaper at the time. You supply your own padding through small towels. I only used this one for a couple of weeks before deciding it wasn’t for me. It made my collars seems to float off of my collarbones in front.
 Some people will actually wear two bras, one close to the skin and one over the juban, but I find this too constricting.
Base Layer
My base layer is unconventional. I always end up changing in front of other people during my lessons and I prefer to be modest. In these photos, I’m wearing my kimono bra, a camisole, and a thin t-shirt. I made sure to choose a t-shirt that wouldn’t interfere with the completed look of the kimono. This means that I chose a shirt with a scoop neck in the front and the back. On the bottom, I’m wearing Japanese thermal underwear called Heat-tec, but any pair of leggings will do.

Padding
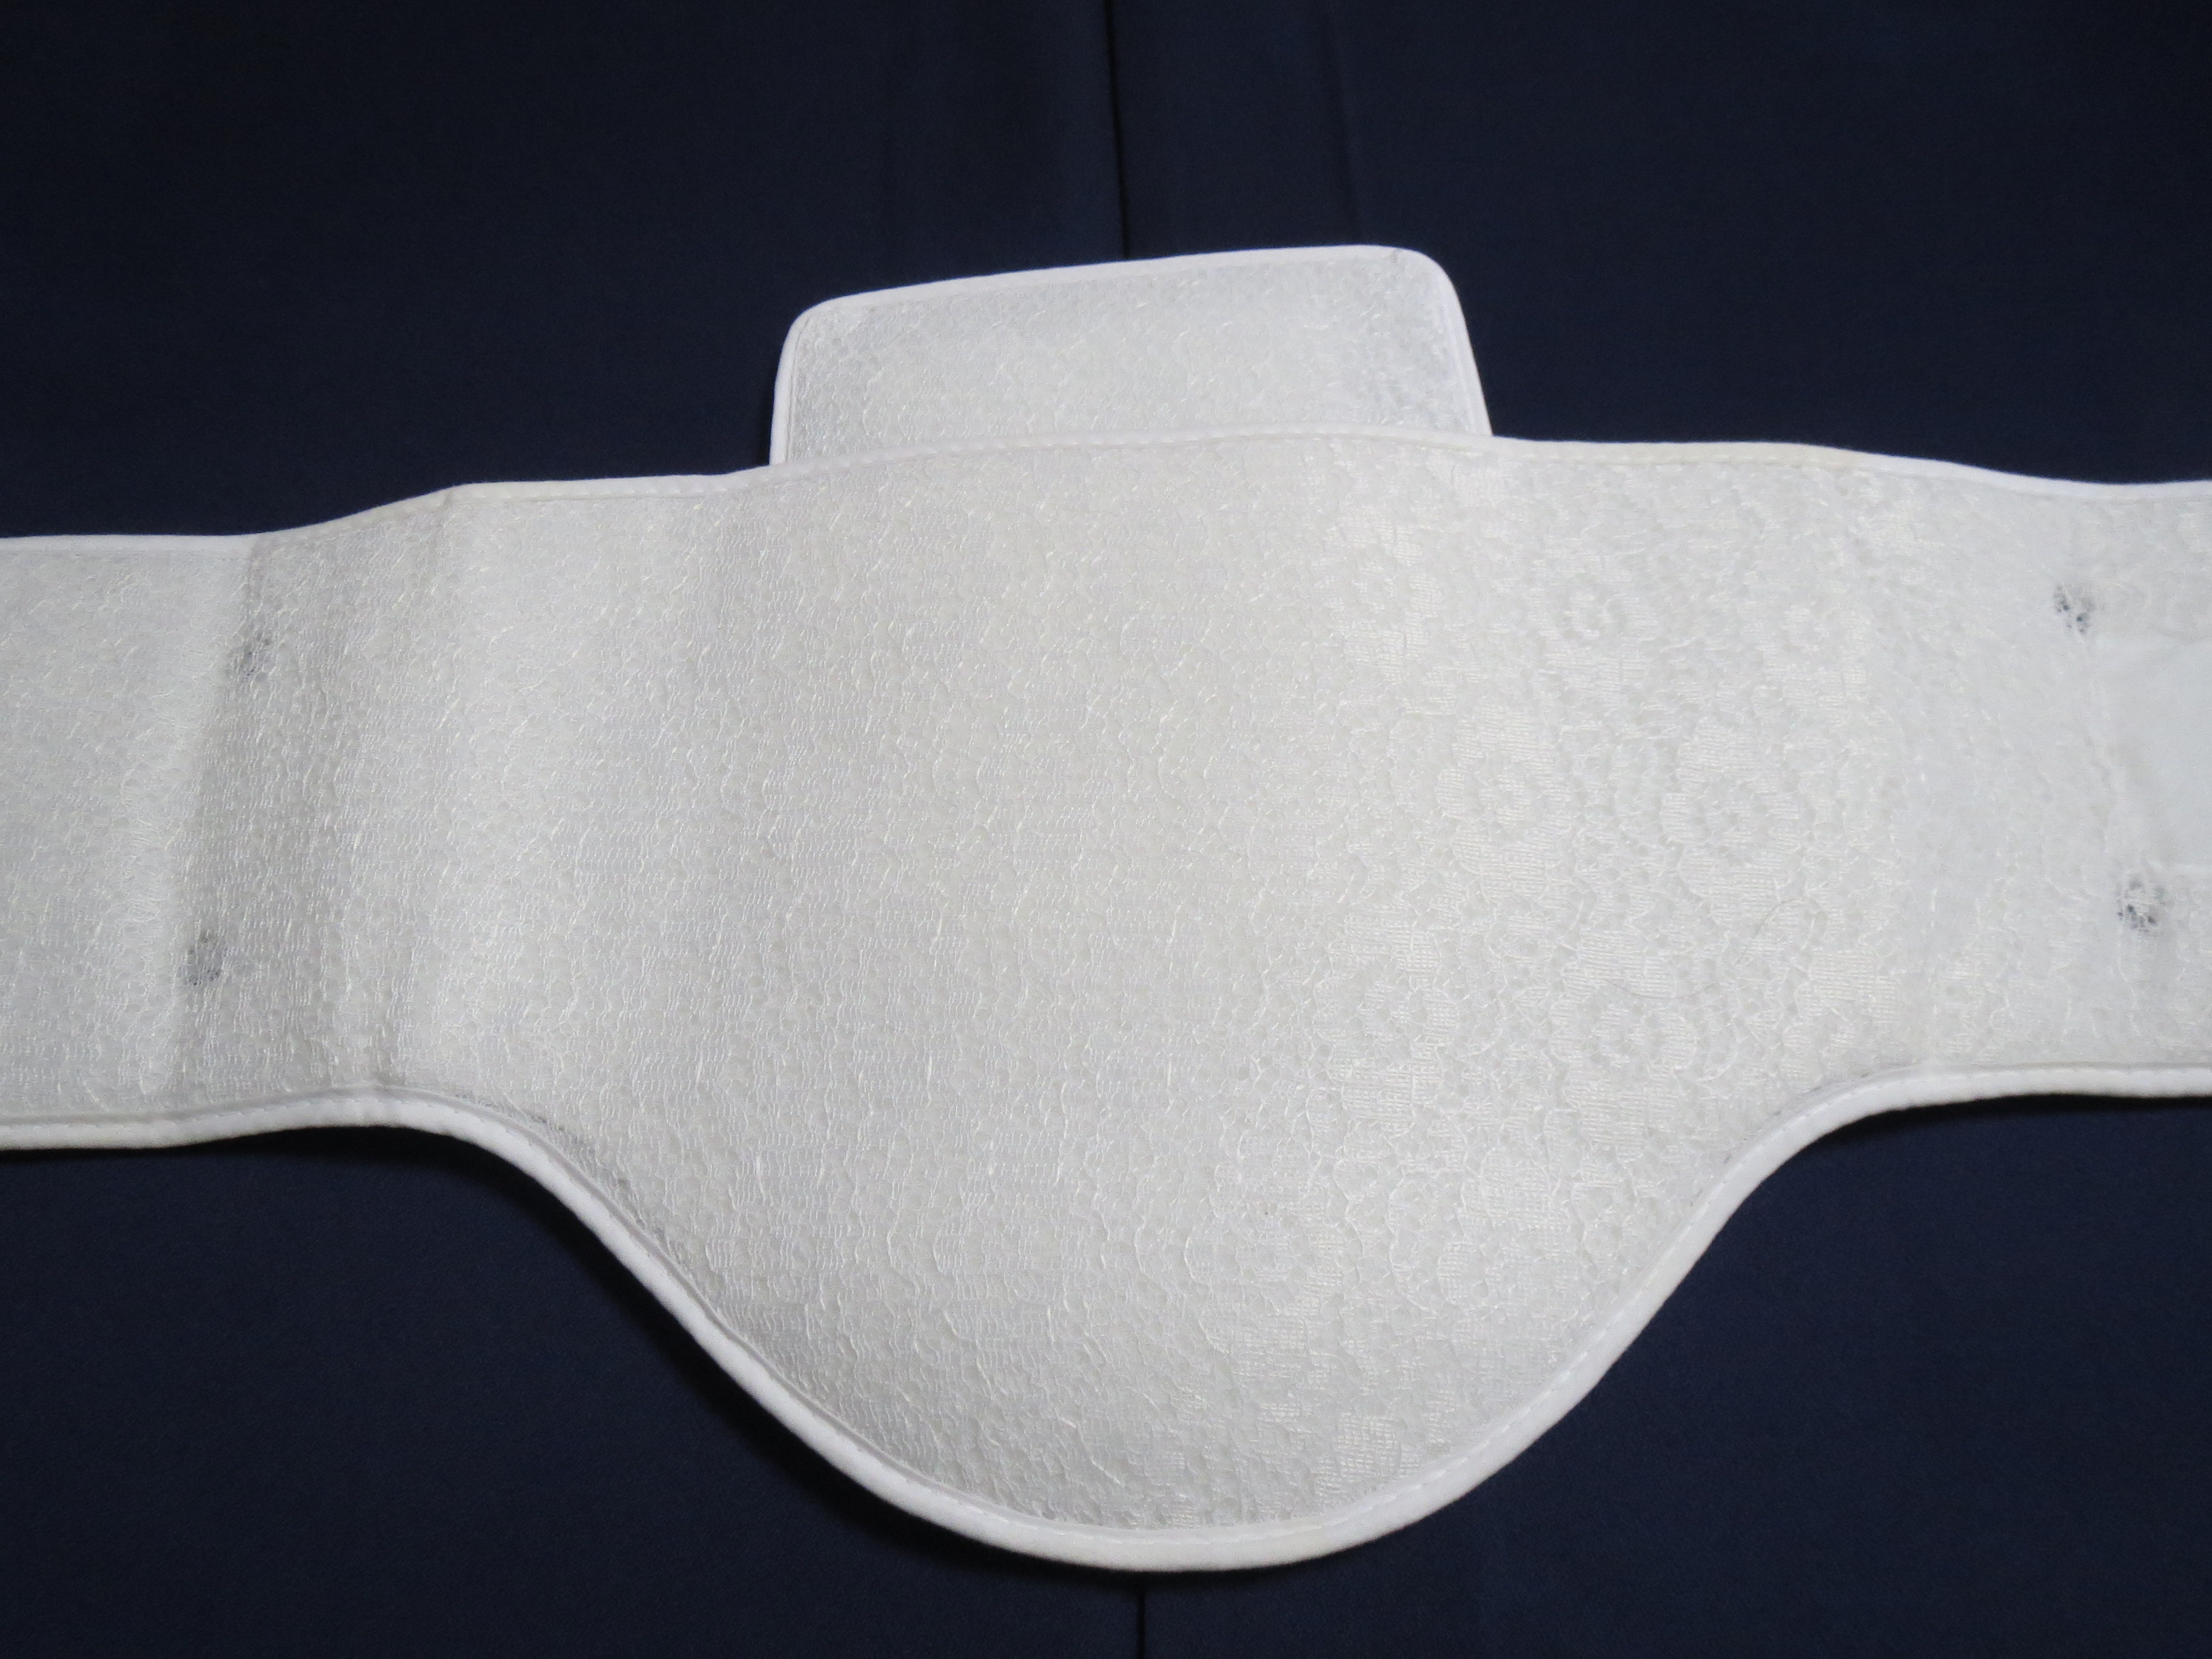
On top of my base layer, I put my padding. Every person has their own combination that works for them. I use a commercially produced hip pad to fill in the small of my back. The pad on its own is not enough, so I use two staggered towels to fill in the rest. I use the thinner of the towels on the bottom of the pad so that it doesn’t add to the natural, excessive, padding I have further down. I don’t use any padding on my front or waist. For me, the fabric of the datejime is enough to fill it in.

Juban
I started off using a full length naga juban, but I found that it would separate very easily and expose my legs if I sat in seiza for two long. I tried out a two piece nagajuban and I like it so much more. First, the skirt is wide enough that I don’t have to worry about my legs making an unscheduled appearance. Second, it’s easier to adjust the top when I only have to worry about half the fabric.

I have modified my juban slightly from the original, out of the package version. This juban came with a chikara nuno (my original full length one did not. I had to add it) but I was advised to attach it to the juban so that it wasn’t hanging loose. I also added a han-eri so that the korin belt would have something significant to grab onto.

You can see the stitches I used to attach the chikara nuno.
I also use a commercially produced erishin to keep the collar crisp. My teacher taught me that when held upright, the erishin looks like a mountain. When I put it into the juban collar, the top of the mountain should still be a mountain (not a valley).
Putting on the skirt of the juban is simple. I make sure that the left side is over the right side, and I also make sure that the hem is high enough that there is no chance it will peek out from under the kimono.

When you put on the skirt, be sure that it is high enough that it won’t show under the hem of the kimono.
The top of the juban is where all the magic happens. When I put it on, the korin belt is already threaded through the chikara nuno. To make sure that your korin belt is the right length, measure it against your shoulders. It should be the same width as your shoulders.

Use the width of your shoulders to measure your korin belt.
I pull down the back collar so that it’s lower than where I actually want it to end up. My collar usually creeps up a bit while I’m getting dressed. This makes sure that it ends up in the right place by the end of the process.

Grab both collars with your left hand and the center of the back of the juban with the right hand and pull several times until it moves smoothly.
According to Liza Dalby in her book Kimono, an average collar has enough room to fit a fist between the collar and the neck. Geisha wear their collars significantly lower. According to Dalby, this is due to the fact that the nape of the neck is considered an area of “erotic focus” in Japanese culture. For more demure women, a collar that is set back the width of three fingers is also acceptable.
Once the back of my collar is in place I bring the korin belt through the miyatsuguchi (the arm hole) and attach it to the juban, a couple of centimeters above the bottom of my ribcage. The other end goes around to the same place on the left side of the juban. After this, my collars are more or less where I want them. I now just have to tug on the juban to get them exactly where I want. This is a huge advantage of using the two piece juban as I have three places that I can tug on quite strongly to get the desired look. Ideally, I want the collars to cross right in the middle of my neck while covering the hollow of the neck.
Once everything is in place, I use a datejime to keep my collars in place. I usually give everything one last tug to make sure the collar stays where I want it to.

Here is my final look.

What She Does
My friend Jen has a very different system of getting dressed. Like me, her first layer is a kimono bra, but after that, everything changes.
Her base layer is a unique juban.

First, this juban includes a thin erishin in the collar. This is used later on to provide a hook for the kantan eri (I’ve also seen it being called an eri sugata).

The very thin eri shin that fits in this style of juban.

Sliding the eri shin into the juban.
Second, it also includes Velcro on the sleeves to attach sleeves too, although she never attaches juban sleeves.(Sorry about no photos of this part. White velcro on white fabric doesn’t photograph very well). Finally, it has pockets sewn inside designed to hold specially made pads. The two half circles are designed to fill in the collarbones, and the triangular pad is designed to fill in any gap in the bust area, but she doesn’t usually use that pad.

Pockets for the padding.

The orientation of all the pads.
Next comes the most important part, adjusting the collar on the juban. If the collar is not low enough in the back it will affect the collars in the front as well as the look of the kimono. Her teacher always encouraged here to pull it really, really low. She pulls on the back until it is low enough, then secures it with the ties attached to the juban.

This is how she looks after the juban is on with nothing else added.

Once the juban is on, she also uses some cotton wrapped in gauze to fill out her shoulders. (Sorry, no photos of this part).
While I put my padding under my juban, she puts hers on over top. She uses two tea towels sewn together with a tie at the end. It wraps around the waist to fill it out.

The front view of the towel, before and after.

The side view of the towel, before and after.
Next comes the kantan eri. To make it extra stiff, Jen uses two erishin instead of one.The kantan eri has stitching on the underside that holds the erishin in place.

The double eri shin inside the kantan eri.
This is one of the most important bits of her underlayers. To start with, she will hook the kantan eri onto the erishin in her juban.

Hooking the kantan eri onto the juban.
Here’s the rest of the process.
The final step for Jen is to use the same commercial hippad that I use. However, she pulls the inner pad up slightly to get the right look.
the hippad with the inner pad pulled up slightly.

The hippad in place.

The final look.
Tips:
Do what works for you. Experiment. Find a combination of padding and juban that gives you a shape you’re happy with. It may take time (it took me two years and I’m still experimenting!) but the results will be worth it.
Don’t be shy on pulling your collar down at the back. Chances are it will creep up during the process of getting dressed, so the lower the better.
I hope you enjoyed reading! Good luck with your kitsuke!

First congratulations on your 着付け license. These are wonderful examples of the dressing a kimono. Thank you. I have been studing kimono dressing since April 2012. And collecting since March 2012. I am fortunate to have a 先生 that comes from a family of traditional dancers. She also teaches at the local Japanese Supplementary School. You may find me on Facebook and LinkedIn.
LikeLike